macklus
Since a while ago I started moving all the services that I currently have towards serverless systems, I also started looking for...
Create an Amazon AWS account
 macklus
 The process of creating an account in Amazon AWS is very simple, and includes a very innovative verification system that can give us some headaches.
For those who want to create an account, here we show you the steps, which begin by opening the address in our browser:
From here, in the upper right corner, we will see an orange button that says “Create an AWS account”, that we must press.
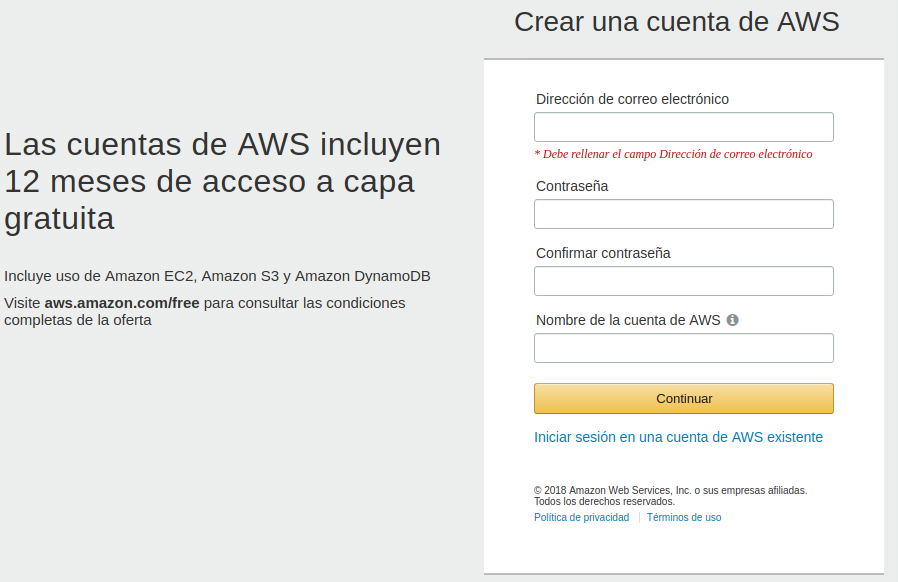
The first thing Amazón AWS asks us is the data that we will use to access our account, which must be related to a valid email account.
In addition, we will have to indicate the name of the account that we want to use, which must be unique (usually it will be our name or that of the company).
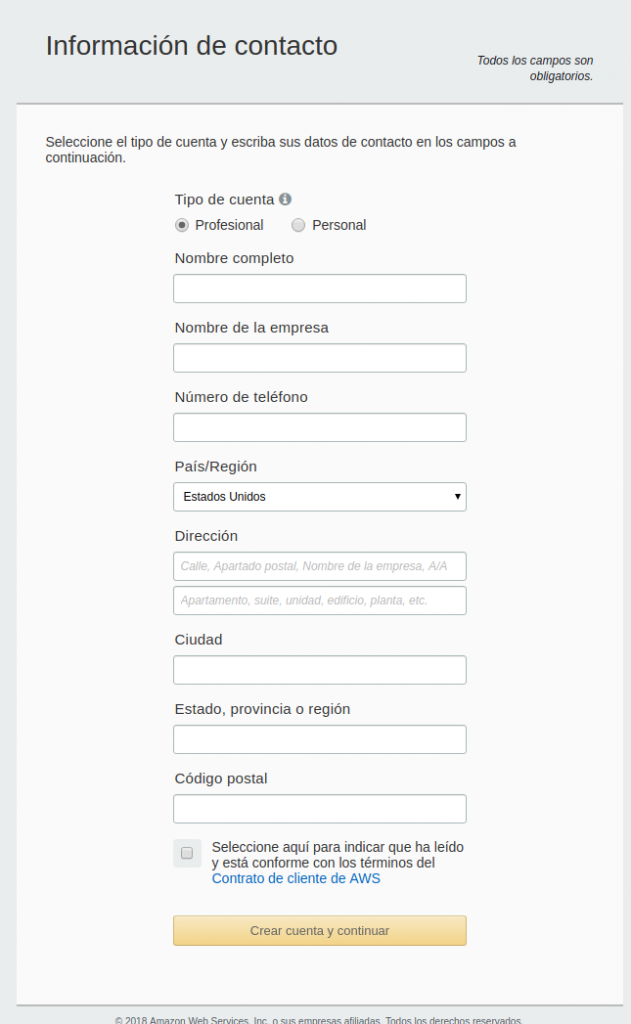
After indicating the data of the account, they will ask us for our personal data, used for contact and billing.
It is important to note that the address field must be indicated in the form Street, PO Box, Company name, and in the lower field will be where we indicate the characteristics of the street (Floor 4, door 2, north staircase, etc). We do not have very clear the reasons for this, being that afterwards they ask us again for the postal code, but we must be alert in case it could give problems with the billing information.
Remind you that the data must be real and reliable, to avoid legal problems.
NOTE: We must have the telephone number that we indicate by hand, in order to make the verification.
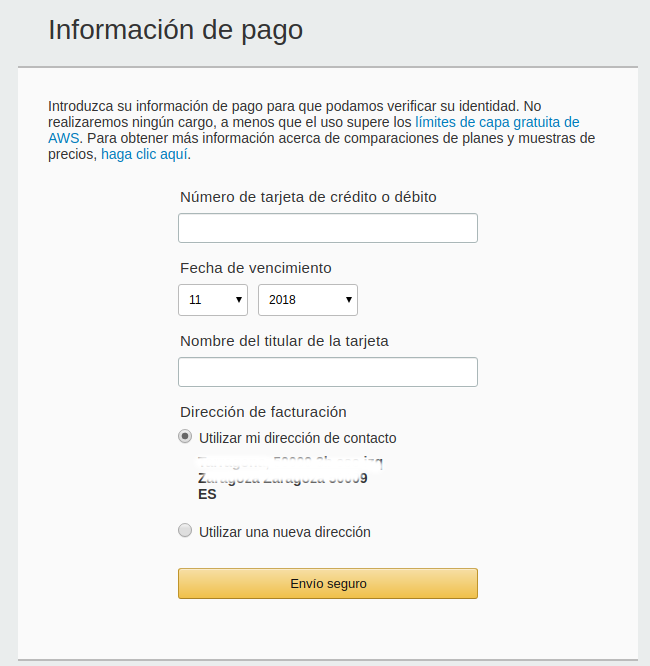
The next step is to indicate a credit card (which has to be valid and be active), although that does not mean that we will incur any charge (they will not do so if we do not exceed the limits of the Amazon AWS free layer).
We must also indicate if we want to use our contact address for the realization of the invoice, or if we want to indicate new data.
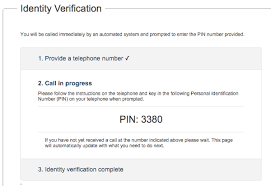
Now that Amazon has our data, they will verify the phone number through a very interesting system.
First, they will show us a code on the screen, and then they will call us at the telephone number we have indicated, and we will have to enter the code with the telephone keypad.
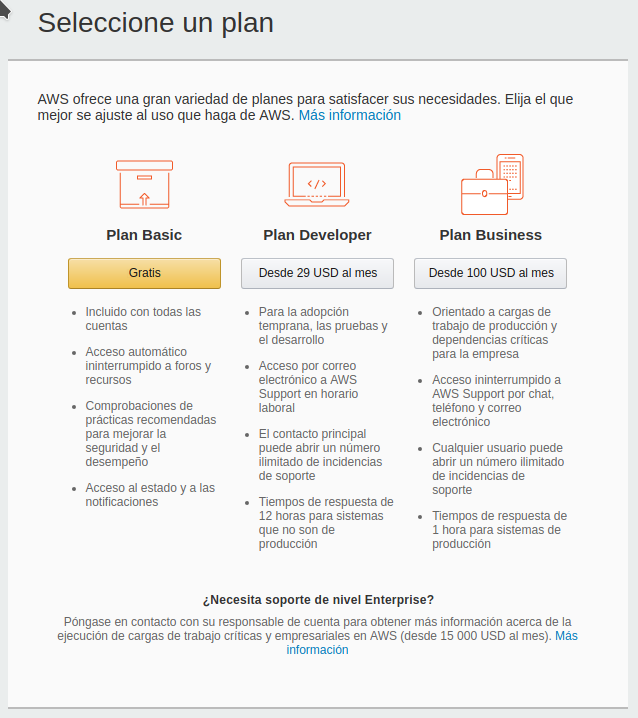
The last step we must complete is to indicate the type of support we want. Although it can lead to confusion, no service plan is indicated here, only the support plan (the speed and way in which Amazon will solve the possible problems that we have).
In general, we will indicate the Free Plan, since it is sufficient for the normal use of our accounts.
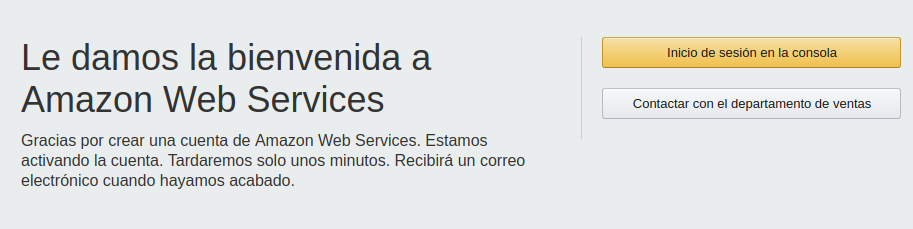
With this, we have our Amazon AWS account created, and we will be redirected to the access page, where we can access with the created data.

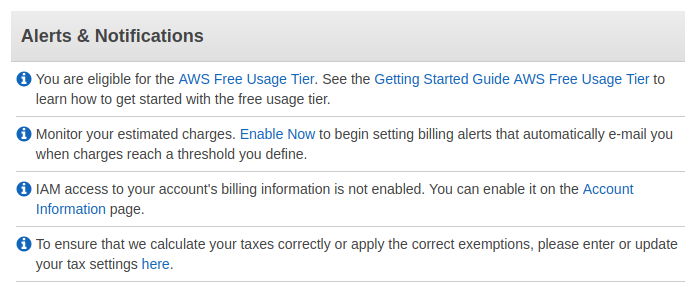
Once we have logged in, we can see in the alert area that we have access to the free AWS layer.